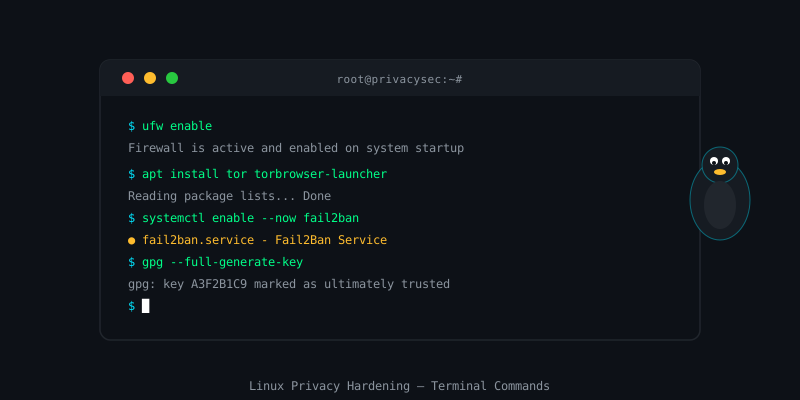
This guide targets Debian/Ubuntu-based distributions. Commands for Arch, Fedora, or others may differ. Always test on a non-production system first. Some steps (disk encryption, kernel parameters) require a reboot and can lock you out if misconfigured — read each section fully before running commands.
Table of Contents
1. Keep the System Updated
The single most impactful security action you can take is keeping your system fully patched. The majority of successful attacks exploit known vulnerabilities that have already been patched — the attacker is counting on you not having applied the update. This guide covers the OS layer; for application-level security, pair it with our password security guide and OPSEC practices.
# Update package lists and upgrade all packages
$ sudo apt update && sudo apt upgrade -y

# Enable automatic security updates
$ sudo apt install unattended-upgrades -y
$ sudo dpkg-reconfigure --priority=low unattended-upgrades

# Check what will auto-update
$ cat /etc/apt/apt.conf.d/50unattended-upgrades
Unattended-upgrades will automatically apply security patches. Review the configuration file to ensure it is set to apply security updates from your distribution's security repository.
2. UFW Firewall
UFW (Uncomplicated Firewall) is a front-end for iptables that makes managing firewall rules straightforward. On a desktop system, the principle is simple: block all incoming connections by default, allow only what you explicitly need.
# Install UFW
$ sudo apt install ufw -y

# Set default policies: deny all incoming, allow all outgoing
$ sudo ufw default deny incoming
$ sudo ufw default allow outgoing

# If you use SSH, allow it before enabling (or you'll lock yourself out)
$ sudo ufw allow ssh

# Allow specific ports only if needed (example: HTTP/HTTPS for a local server)
$ sudo ufw allow 80/tcp
$ sudo ufw allow 443/tcp

# Enable the firewall
$ sudo ufw enable

# Check status
$ sudo ufw status verbose
Rate Limiting SSH
If you expose SSH to the internet, add rate limiting to reduce brute-force risk:
# Allow SSH with rate limiting (blocks IPs after 6 failed attempts in 30 seconds)
$ sudo ufw limit ssh
Logging
# Enable UFW logging (low = blocked packets only)
$ sudo ufw logging low

# View firewall logs
$ sudo journalctl -u ufw --since "1 hour ago"
3. Fail2Ban
Fail2Ban monitors log files and automatically bans IP addresses that show malicious signs — like too many failed SSH login attempts. It is a complement to UFW, not a replacement.
# Install Fail2Ban
$ sudo apt install fail2ban -y

# Copy default config to local override (never edit jail.conf directly)
$ sudo cp /etc/fail2ban/jail.conf /etc/fail2ban/jail.local

# Edit local config
$ sudo nano /etc/fail2ban/jail.local
In jail.local, find the [sshd] section and configure:
[sshd]
enabled  = true
port     = ssh
maxretry = 5
bantime  = 1h
findtime = 10m
# Enable and start Fail2Ban
$ sudo systemctl enable --now fail2ban
# Check status and active bans
$ sudo fail2ban-client status
$ sudo fail2ban-client status sshd4. SSH Hardening
If you use SSH (remote access), the default configuration has several settings that should be tightened.
# Edit SSH server configuration
$ sudo nano /etc/ssh/sshd_config
Apply these settings:
# Disable root login over SSH
PermitRootLogin no

# Disable password authentication — use SSH keys only
PasswordAuthentication no
ChallengeResponseAuthentication no

# Disable empty passwords
PermitEmptyPasswords no

# Only allow specific users (replace 'yourusername')
AllowUsers yourusername

# Use only strong key exchange algorithms
KexAlgorithms curve25519-sha256,diffie-hellman-group16-sha512

# Disconnect idle sessions after 5 minutes
ClientAliveInterval 300
ClientAliveCountMax 2
# Restart SSH to apply changes
$ sudo systemctl restart sshd
# Generate an Ed25519 SSH key pair (on your CLIENT machine)
$ ssh-keygen -t ed25519 -C "[email protected]"
# Copy your public key to the server
$ ssh-copy-id -i ~/.ssh/id_ed25519.pub yourusername@server5. Disk Encryption with LUKS
Full disk encryption ensures that if your machine is physically stolen or seized, the data on it is unreadable without the passphrase. On most modern Linux installers, you can enable LUKS during installation — this is strongly recommended for laptops.
If your system is already installed without encryption, the practical approach is to back up your data, reinstall with LUKS enabled, and restore. Encrypting an existing root partition in-place is complex and risky.
# Check if your disk is already encrypted
$ lsblk -o NAME,FSTYPE,MOUNTPOINT | grep -i crypt

# If you need to encrypt an external or secondary drive:
# WARNING: this destroys all data on the device
$ sudo cryptsetup luksFormat /dev/sdX

# Open the encrypted volume
$ sudo cryptsetup open /dev/sdX myencrypteddrive

# Format and mount
$ sudo mkfs.ext4 /dev/mapper/myencrypteddrive
$ sudo mount /dev/mapper/myencrypteddrive /mnt/secure

# Close it when done
$ sudo umount /mnt/secure
$ sudo cryptsetup close myencrypteddrive
Verify Your Boot Encryption
# Check your LUKS setup
$ sudo cryptsetup luksDump /dev/sdaX

# Verify encryption details
$ sudo dmsetup info
6. DNS over TLS with systemd-resolved
By default, DNS queries are sent in plaintext — your ISP (and anyone on your network) can see every domain you look up, even if you use HTTPS for the actual connections. DNS over TLS (DoT) encrypts these queries.
# Edit systemd-resolved config
$ sudo nano /etc/systemd/resolved.conf
[Resolve]
DNS=9.9.9.9#dns.quad9.net 149.112.112.112#dns.quad9.net
FallbackDNS=1.1.1.1#cloudflare-dns.com
DNSOverTLS=yes
DNSSEC=yes# Restart and verify
$ sudo systemctl restart systemd-resolved
$ resolvectl status | grep -A5 "DNS Servers"
# Test that DNS is encrypted
$ resolvectl query Hidden Wiki.example.comQuad9 (9.9.9.9) is a non-profit DNS resolver that does not log personal data and blocks malicious domains.
7. AppArmor
AppArmor is a Linux security module that restricts what individual programs can do — even if they are compromised. It uses per-application security profiles that define which files, directories, and system calls the application is allowed to access.
# Install AppArmor utilities
$ sudo apt install apparmor apparmor-utils apparmor-profiles apparmor-profiles-extra -y

# Check AppArmor status
$ sudo aa-status

# List profiles and their mode
$ sudo apparmor_status | head -30

# Put a profile in enforce mode (active enforcement)
$ sudo aa-enforce /etc/apparmor.d/usr.bin.firefox

# Put a profile in complain mode (log violations without blocking — for testing)
$ sudo aa-complain /etc/apparmor.d/usr.bin.firefox

# View AppArmor denials in logs
$ sudo journalctl -b | grep -i apparmor | grep -i denied
8. System-Wide Tor Routing with Torsocks
Tor Browser routes only browser traffic through Tor. For certain tasks, you may want to route specific applications through Tor. torsocks achieves this without routing all system traffic (which is complex and has DNS leak risks).
# Install Tor and torsocks
$ sudo apt install tor torsocks -y

# Enable and start the Tor service
$ sudo systemctl enable --now tor

# Verify Tor is running
$ sudo systemctl status tor

# Route a specific command through Tor
$ torsocks curl https://check.torproject.org/api/ip

# Route wget through Tor
$ torsocks wget -q -O- https://ifconfig.me

# Open a Tor-routed shell (all commands in this shell use Tor)
$ torsocks bash
Full System Tor Routing (Advanced)
Routing all system traffic through Tor requires iptables rules to intercept and redirect traffic. This is more complex and has risks (DNS leaks if misconfigured). Consider using Whonix or Tails — purpose-built operating systems that handle this safely — rather than configuring it manually on a general-purpose system.
9. GPG Key Setup
GPG (GNU Privacy Guard) enables you to encrypt files and emails and to sign documents so recipients can verify they came from you. It is the foundation of encrypted email (with tools like Thunderbird + Enigmail) and file encryption.
# Generate a new GPG key pair (choose Ed25519 for the key type)
$ gpg --full-generate-key

# List your keys
$ gpg --list-secret-keys --keyid-format=long

# Export your public key (share this with people who want to send you encrypted messages)
$ gpg --armor --export [email protected] > publickey.asc

# Encrypt a file for a recipient (they must have shared their public key with you)
$ gpg --encrypt --armor --recipient [email protected] file.txt

# Decrypt a file encrypted to you
$ gpg --decrypt file.txt.asc

# Sign a file (proves it came from you)
$ gpg --clearsign document.txt

# Verify a signature
$ gpg --verify document.txt.asc
Key Expiry and Revocation
# Always create a revocation certificate immediately after generating keys
$ gpg --gen-revoke [email protected] > revoke.asc
# Store this certificate securely offline — it lets you invalidate your key if it's compromised

# Set an expiry date (recommended: 1–2 years, renewable)
$ gpg --edit-key [email protected]
gpg> expire
gpg> save
10. Auditing Your System
Periodic audits help you catch misconfigurations, unexpected network connections, and signs of compromise.
Check Listening Services
# See what services are listening on network ports
$ sudo ss -tlnp

# Or with netstat (older systems)
$ sudo netstat -tlnp
Check Running Processes
# List all running processes sorted by CPU
$ ps aux --sort=-%cpu | head -20

# Check for unexpected network connections
$ sudo ss -antp | grep ESTABLISHED
Lynis Security Audit
# Install Lynis — comprehensive security auditing tool
$ sudo apt install lynis -y

# Run a full system audit
$ sudo lynis audit system

# View the report
$ sudo cat /var/log/lynis-report.dat | grep warning
Lynis scores your system and provides specific, prioritised recommendations. Aim for a hardening index above 70. A fresh Ubuntu install typically scores around 55–65 — implementing the steps in this guide should push you significantly higher.
rkhunter — Rootkit Detection
# Install and run rkhunter
$ sudo apt install rkhunter -y
$ sudo rkhunter --update
$ sudo rkhunter --check --skip-keypressFor maximum privacy, consider running Whonix (a privacy-focused OS pair that routes all traffic through Tor) or Tails (an amnesic live OS that leaves no trace). Both are far easier to configure correctly than a manually hardened general-purpose system.
Related Articles

The Complete Beginner's Guide to the Tor Network
How onion routing works, how to use Tor Browser safely, and what Tor can and cannot protect you from.

OPSEC for Everyday People: Protect Your Digital Life
Threat modeling, compartmentalization, pseudonyms, metadata scrubbing — for everyday people.
VPNs and Privacy: What They Actually Do (And Don't Do)
No-hype breakdown of VPN protocols, no-log audits, jurisdiction, and how to spot VPN marketing lies.